
Setup ShareX
To automatically upload the screenshots you have to take to voided.host, you must configure a screenshot software on your computer. At the moment we only support ShareX, you will find easy-to-follow instructions to configure ShareX to work with voided.host.
Download ShareX
For this to work, you obviously need to install ShareX. To install ShareX, head over to their Official Website, click Download, and then choose Setup to install the latest version. Always make sure, you download software from official websites, to ensure your security and prevent yourself from installing malicious software.
If you want to setup ShareX using the Configuration File, there is an alternative to download ShareX and the configuration simultaneously here
Setup using Config
The easiest way to setup ShareX is using a configuration file. Follow these next few steps, or watch our Setup Tutorial on YouTube.
Download Configuration File
The first step is to download the configuration file, you can do that on your Dashboard Overview by clicking Download ShareX Config in the Downloads section. It will be a ShareX Custom Uploader (.sxcu) file, which stores the data for the Custom Uploader in ShareX.
Alternative: Download Installation File
If you do not have ShareX installed yet, you can also download the Installation File by clicking Download Installation File in the Download section. This will give you an installation file, which first downloads ShareX and then configures it. When using this option, you can skip the next step, as it be done automatically. All you need to do is confirm that you want to use voided.host as your default uploader.
Configure ShareX
Once you've downloaded the configuration file, all that's left to do is to open it. It will open ShareX and ask you if you want to use voided.host as your default uploader, you need to confirm this and then ShareX will be configured.
Setup manually
Alternatively, you can manually configure ShareX. This approach is significantly slower but gives you the option to better understand what you are actually configuring. Follow these next few steps, or watch our Setup Tutorial on YouTube.
Configure ShareX
To configure ShareX manually, first you need to get you Upload Key. You can find it in your User Settings. Then in ShareX you must follow these steps:
- Set your Image uploader to
Custom Image uploader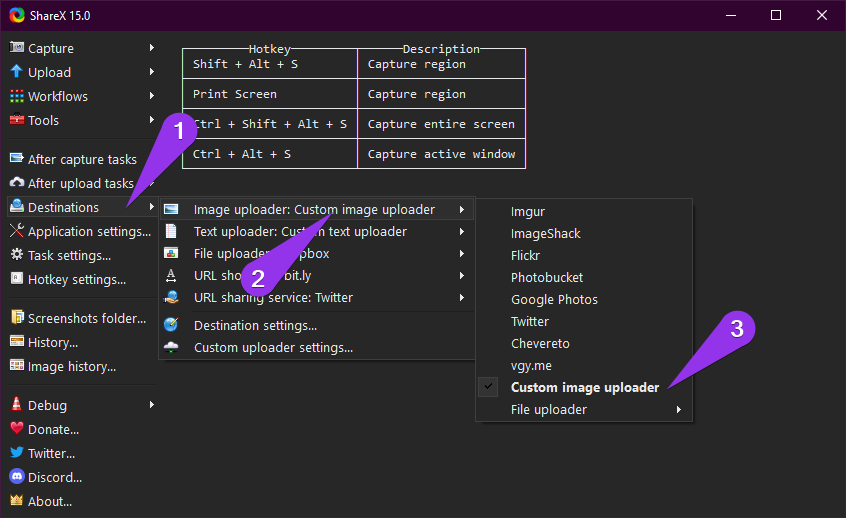
- Open your Custom uploader settings
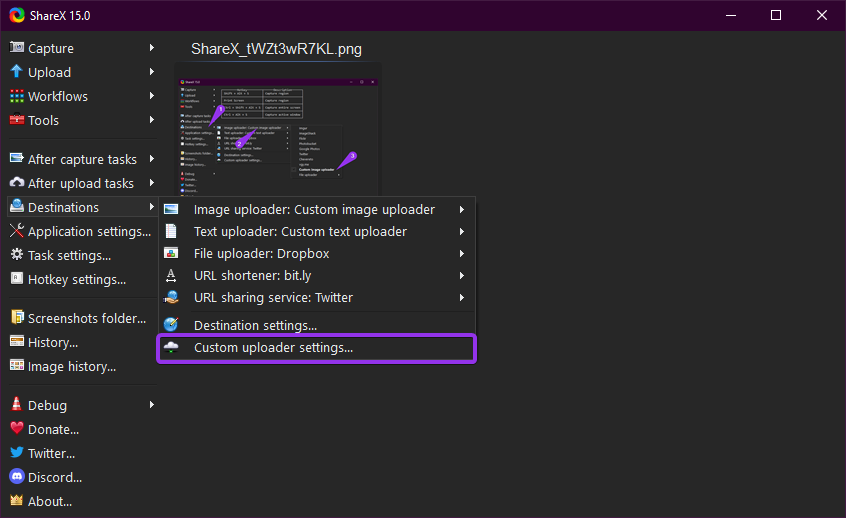
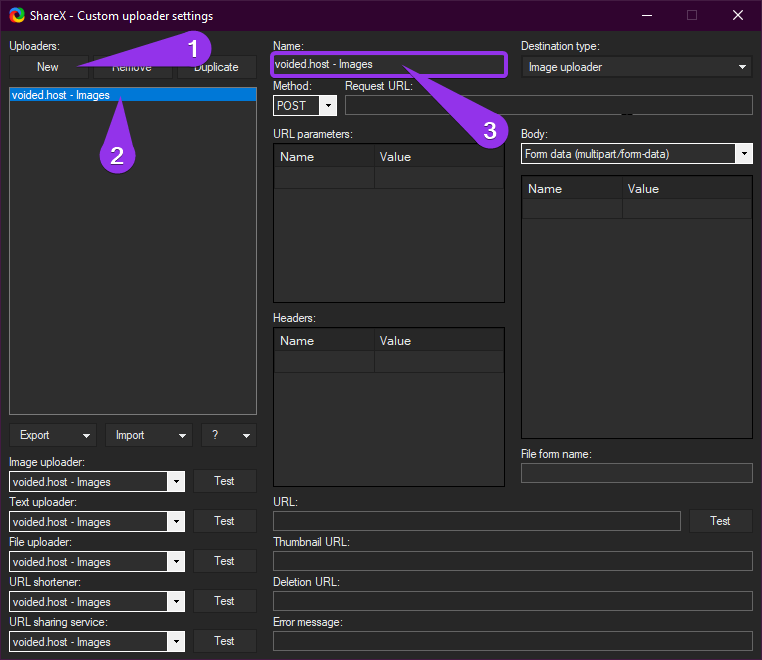
- Create a new Uploader, open it, and give it an appropriate name
- Set the Destination type to
Image uploader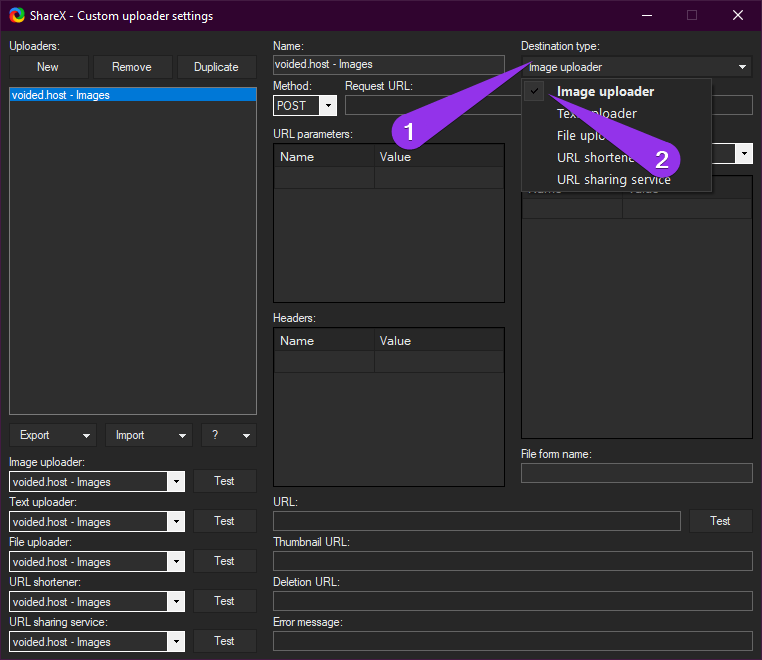
- Set the methode to
POSTand the Request URL ashttps://api.voided.host/images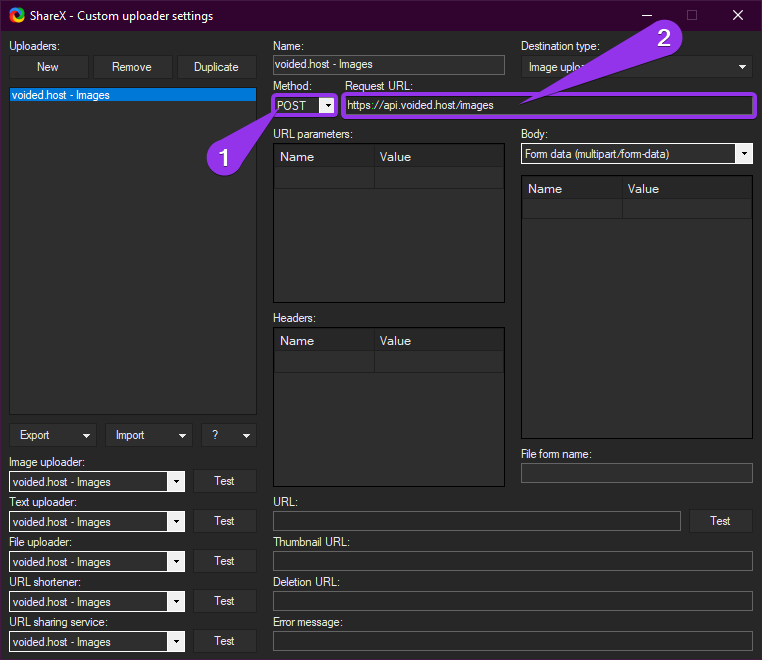
- Set the body to
Form data (multipart/form-data)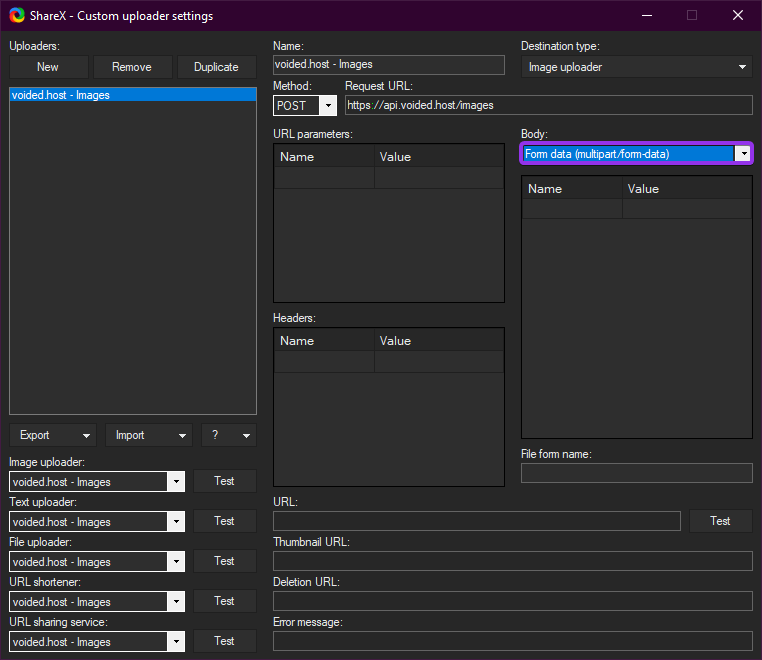
- Create a new Header with the name
authorizationand your Upload Key as the value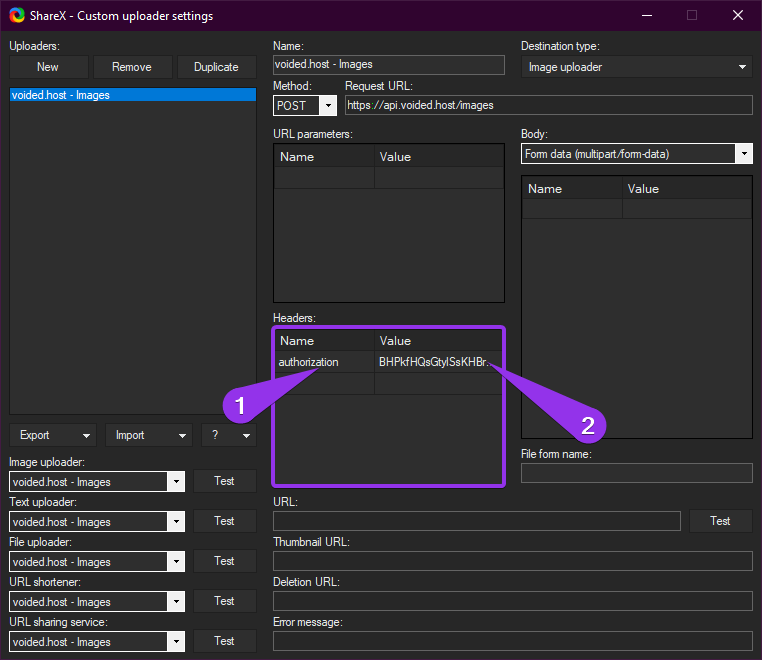
- Set File form name to
file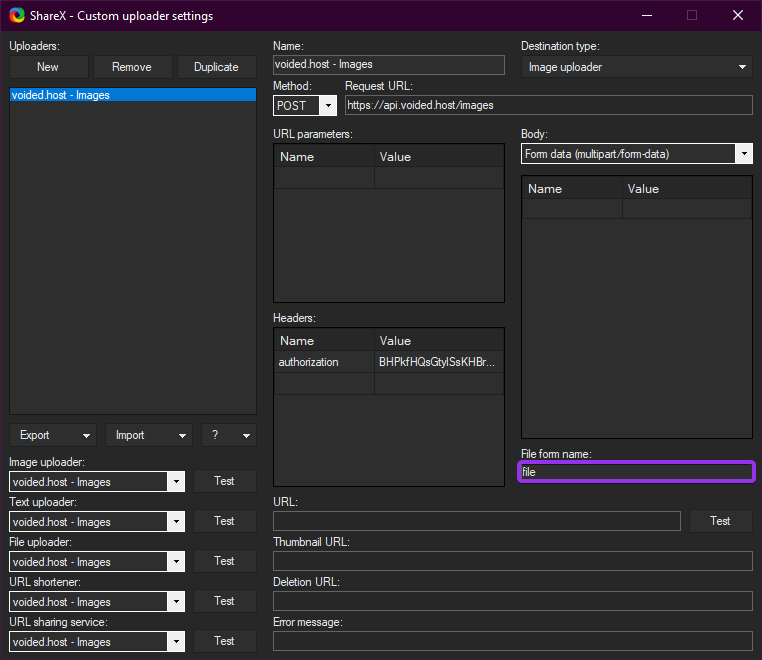
- Enter
{json:data.shareLink}as the URL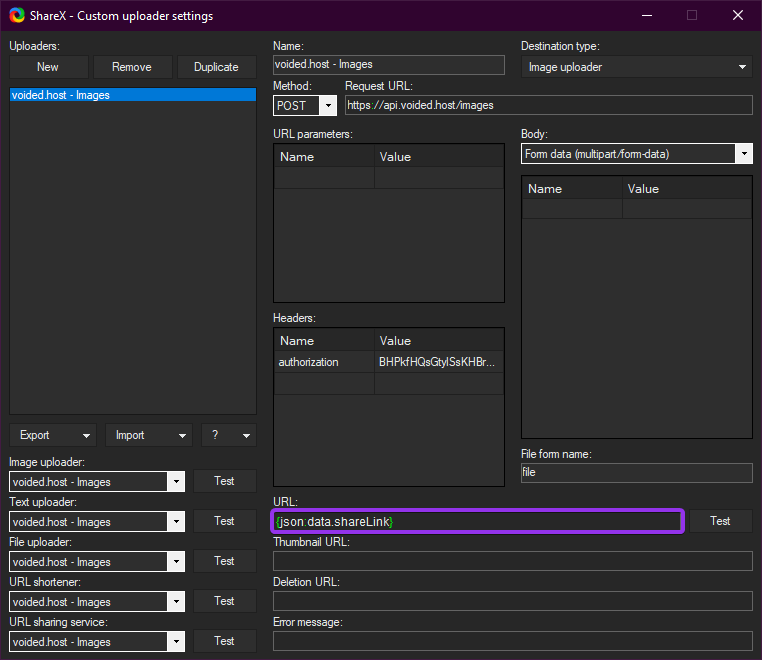
- For the deletion URL set
https://voided.host/settings/image/{json:data.id}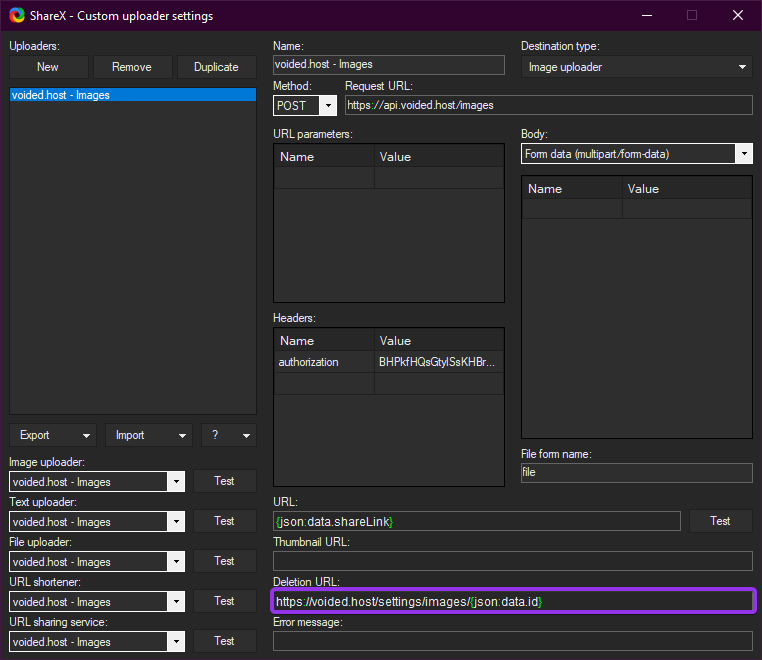
- And as Error message, you just have to set
Error: {json:message}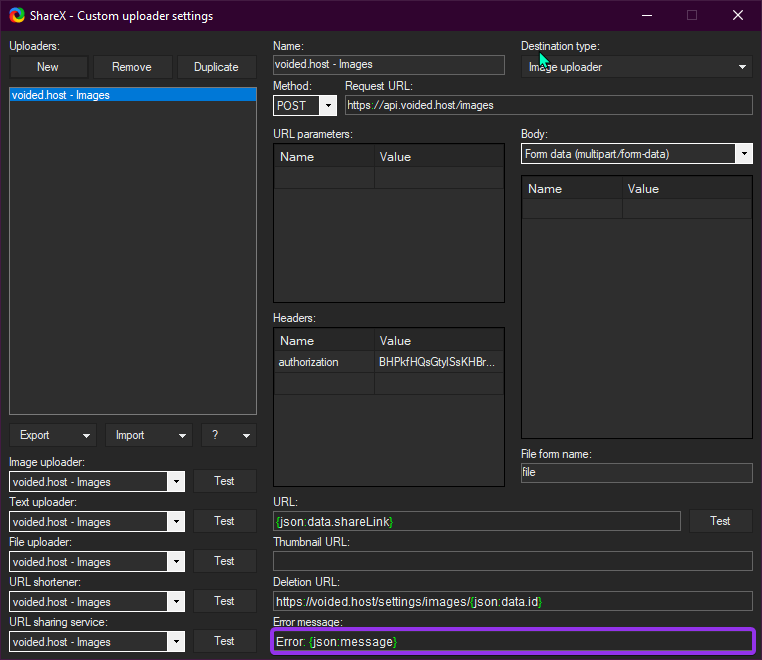
- Lastly, make sure that your uploader is set as the Image uploader
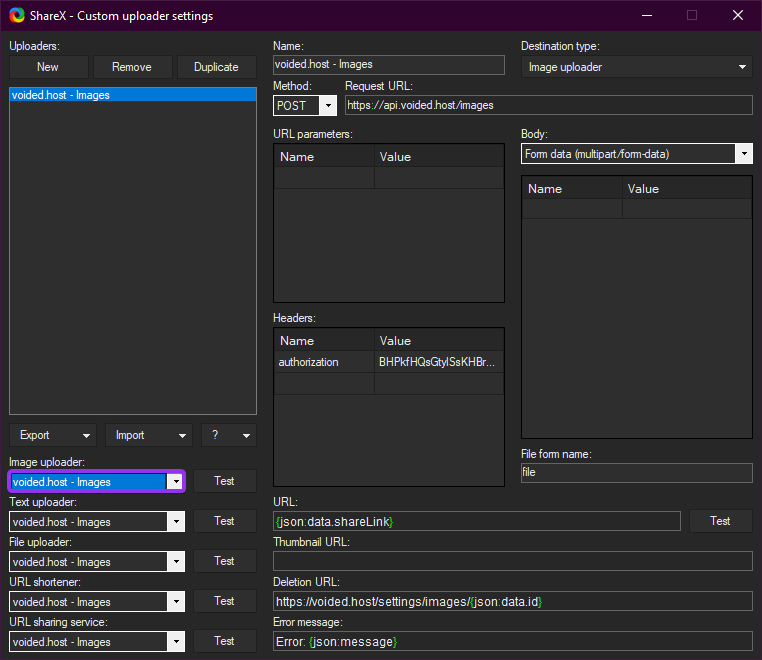
- And done, now all of your Screenshots will be automatically uploaded to voided.host
Update Upload Key
In some cases you might need to Update your Upload Key in ShareX. To do this open ShareX and follow these simple steps:
- Open your Custom uploader settings
- Update the value of the authorization header with your new Upload Key
- And done, that's all you need to do to Update your Upload Key